Final Product What You'll Be Creating
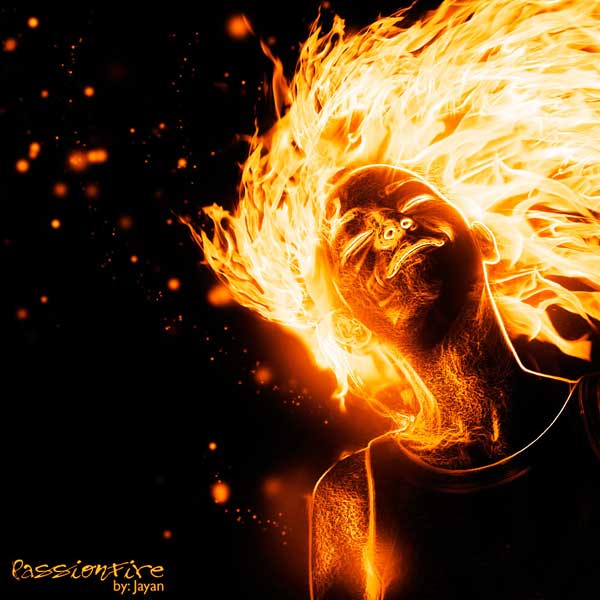
Editor’s note: This tutorial was originally published on Psdtuts in January 2009.
Step 1
For this project, I used two nice images that suits for the manipulation; image1, image2. I would like to thank the author of this two great pictures, which is thiquinho and huibidos from sxc.hu. And before we continue with the steps, I need to inform you that this tutorial is written using Photoshop CS3.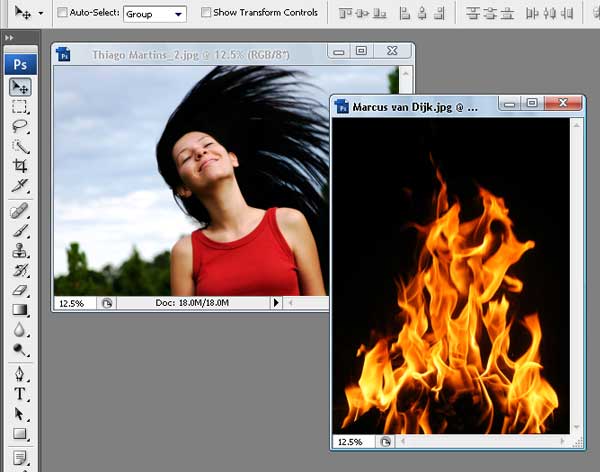
Step 2
Let’s start with image1, open and duplicate this image by using the Image > Duplicate command from the menu bar. In the Duplicate Image dialog box, you can name it anything you like, but to follow this tutorial reference, name it "PassionFire" and hit OK. By doing this, we kept the original image. Be sure to save.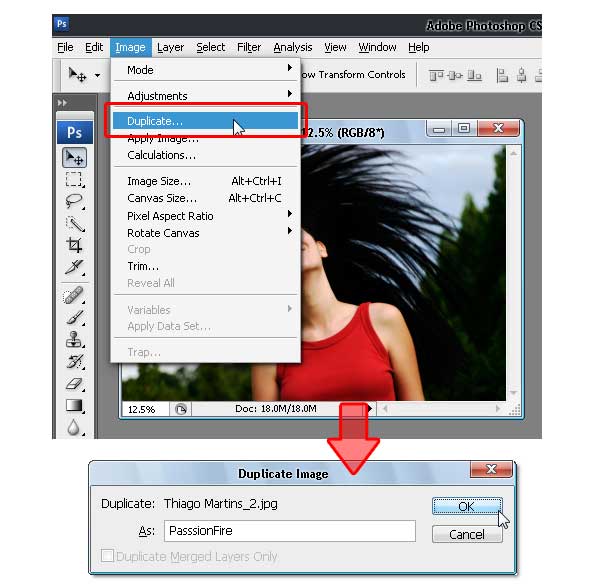
Step 3
With the "PassionFire" image active, duplicate the "background" layer. Set the foreground and background color to black and white by pressing D on the keyboard. Click the "background" layer again and fill it with the foreground color ~ which is set to black. See the images below.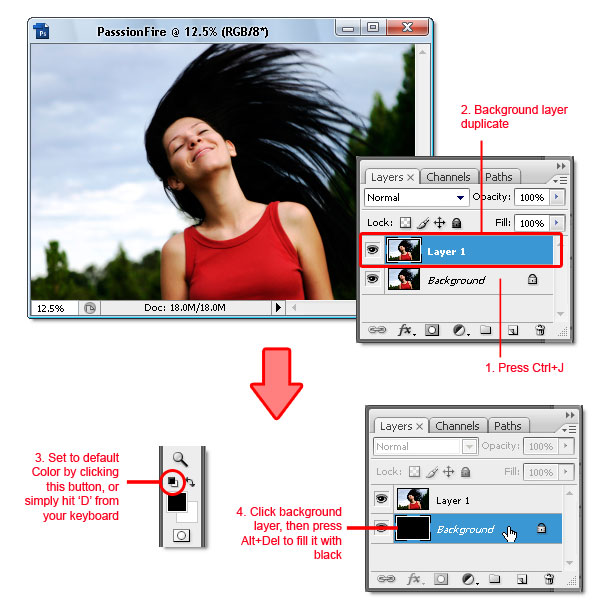
Step 4
Reactivate "Layer 1," then press Command + Shift + U to apply desaturate command. Now invert the color by pressing Command + I. Your image should look like a film’s negative now.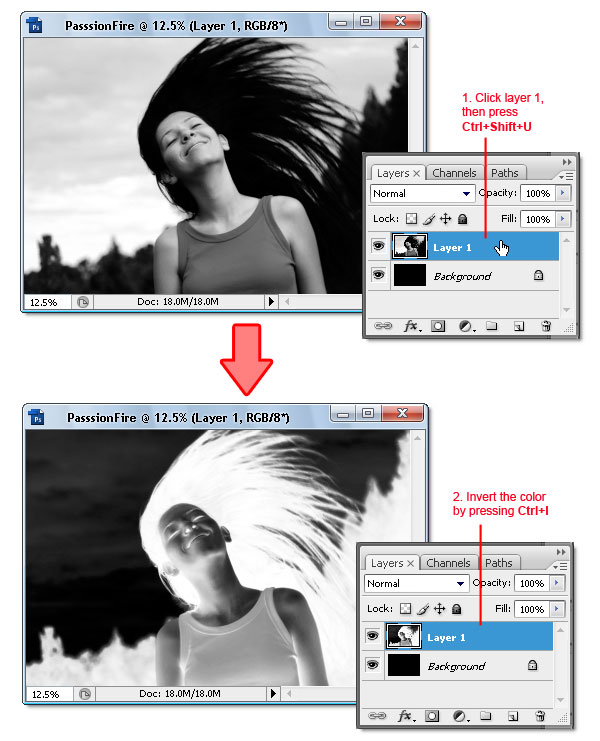
Step 5
Duplicate "Layer 1," then apply the find edges filter from Filter > Stylized > Find Edges. Next, invert the color by pressing Command + I and change the Blending Mode to Hard light. There, your image now has contrast white line and a very dark background.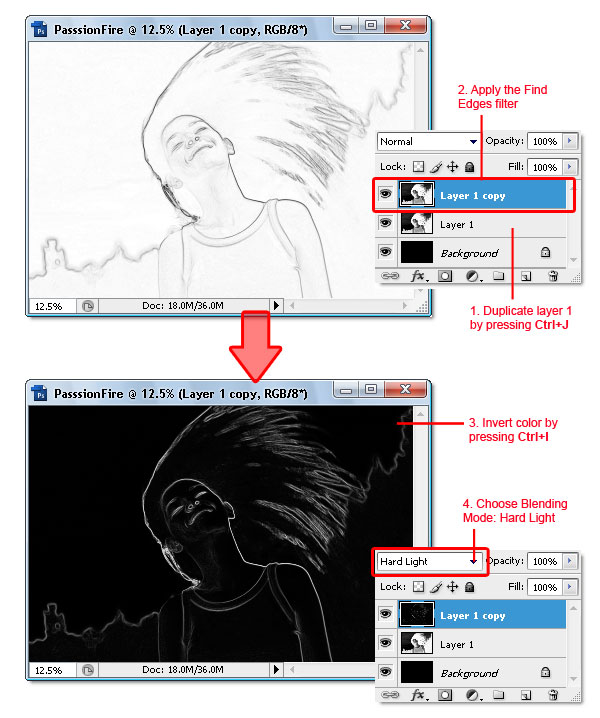
Step 6
To give the white line more contrast, duplicate the "Layer 1" copy then change the Blending Mode to Screen.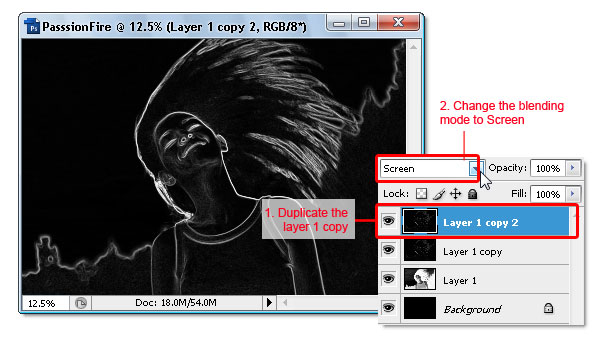
Step 7
Now we move to the second image. Drag image2 into "PassionFire" document image window using the Move tool. If the Paste profile mismatch dialog appears, just click OK to fix it.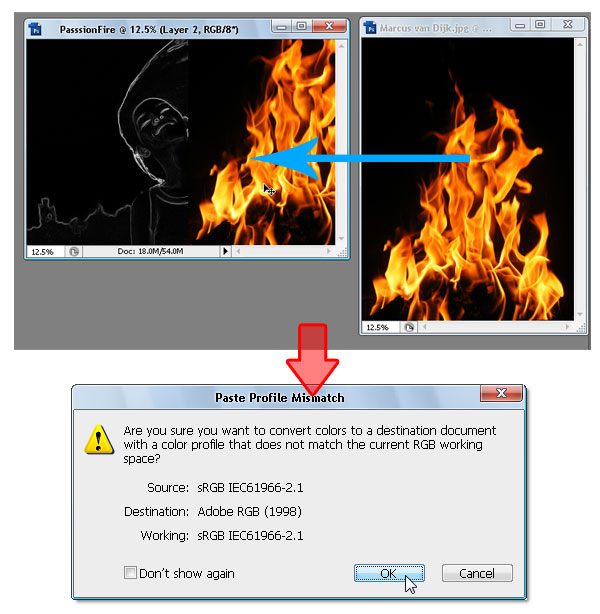
Step 8
The fire image from "image2" should be in "Layer 2" now. Change its Blending Mode to screen, this will hide all the black colors in "Layer 2." If done right, your image should be similar to the one below.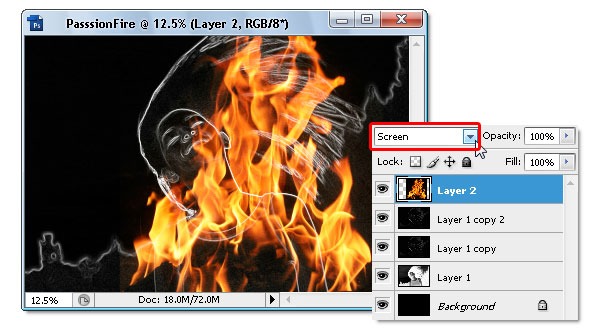
Step 9
Duplicate "Layer 2" by pressing Command + J. Make sure you use the Screen Blending mode, same as the original "Layer 2." Next, make "Layer 2" become invisible by hiding it from the layers panel.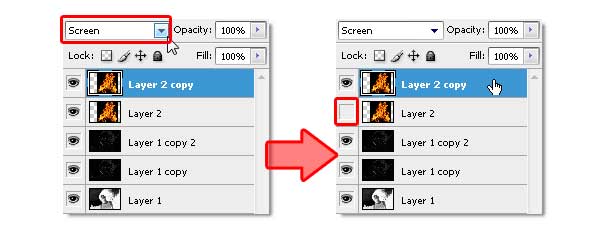
Step 10
Click the "Layer 2 copy" to make it active, then use the Free Transform command ( Edit > Free Transform) to rotate and resize the fire image like shown below. Don’t forget to press Enter when you’re done transforming.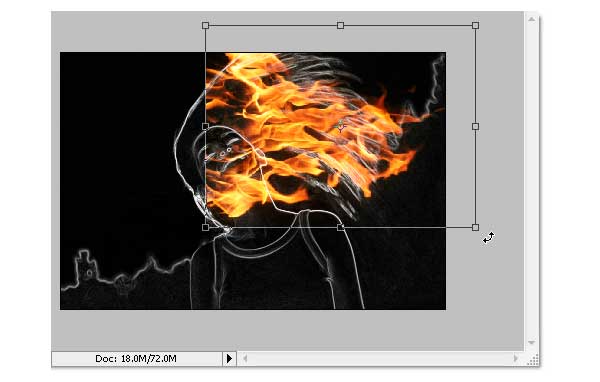
Step 11
Still in the same layer, now use the warp command (Edit > Transform > Warp) to bend the fire image – so it following the hair flow. Press Enter when done. See the example below as a reference.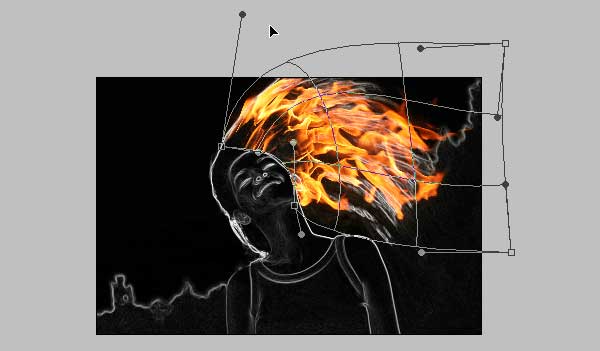
Step 12
If you feel the result is not quite good enough, simply use the Liquify filter to fix it. I assume you already know how to use the liquify filter; the Forward Warp tool and Twirl Clockwise tool is the only tool I used to get this result (see image below).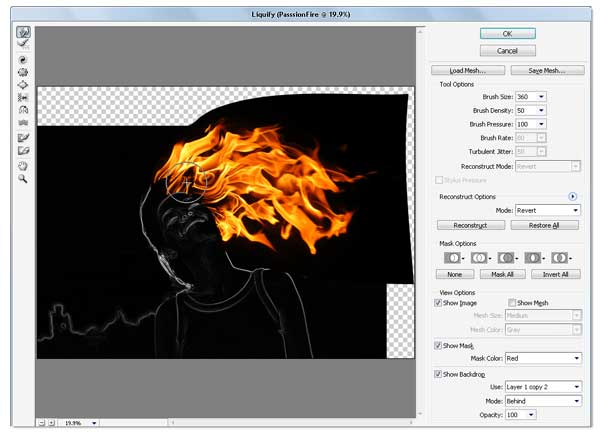
Step 13
Duplicate the "Layer 2" copy, then use the Free Transform command to resize and rotate the fire image in the current layer. Don’t forget to reposition the fire image too. Once you get this composition (see image below), hit Enter.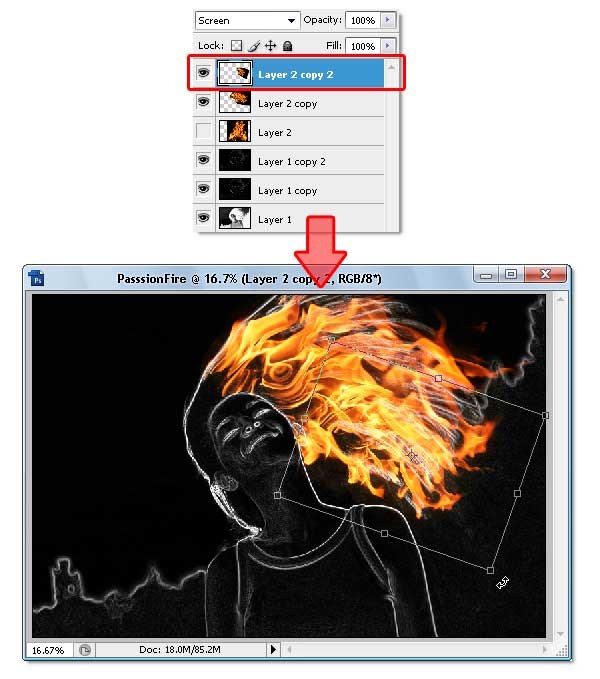
Step 14
Repeat the previous process to get the hair covered with fire. Just duplicate and modify the layer until you get all the hair part covered. If needed, use the Liquify Filter again. The end result of this process should look like the image below, notice how many layers are used.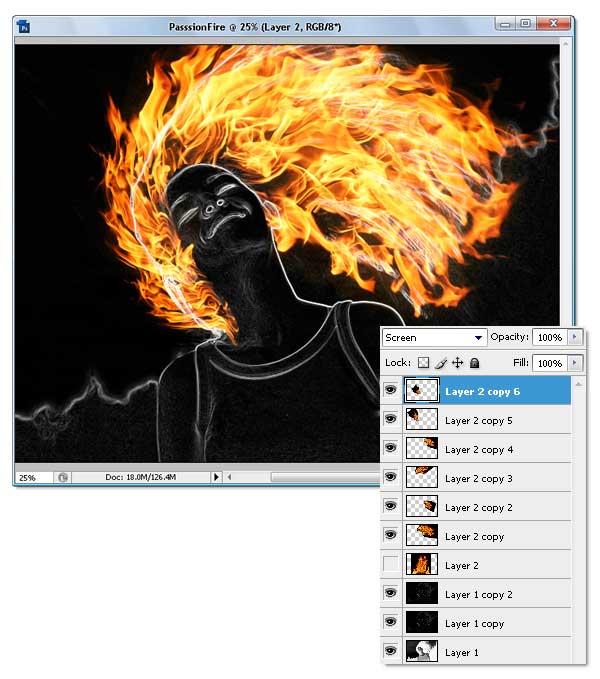
Step 15
Okay, now activate "Layer 2" and make it visible again. Then Change the Blending Mode to Vivid Light. This step will colorize only the white line in the layer below it.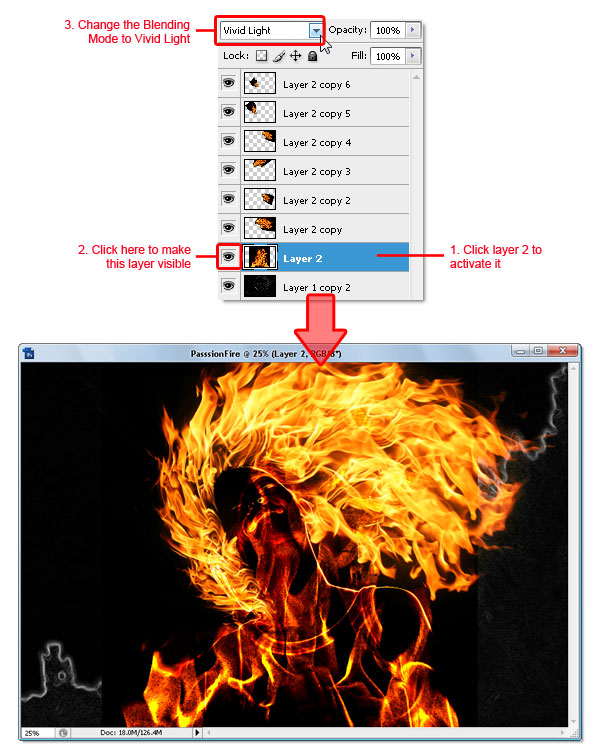
Step 16
Still in "Layer 2," apply the Free Transform command to resize and rotate the fire image like shown below. The purpose is to cover up the girl’s body and hair with the fire texture. Press Enter when you’re done transforming.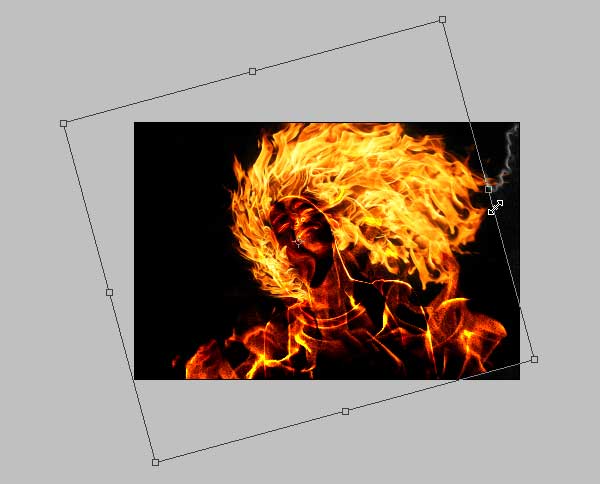
Step 17
We’re gonna blur the fire image in "Layer 2," To do so, apply the Gaussian Blur filter from the Filter > Blur > Gaussian Blur menu. Fill the Radius around 10 to 15 pixels, then click OK when done. Blurring the fire image will cause its texture to blend smoother with the layer below it.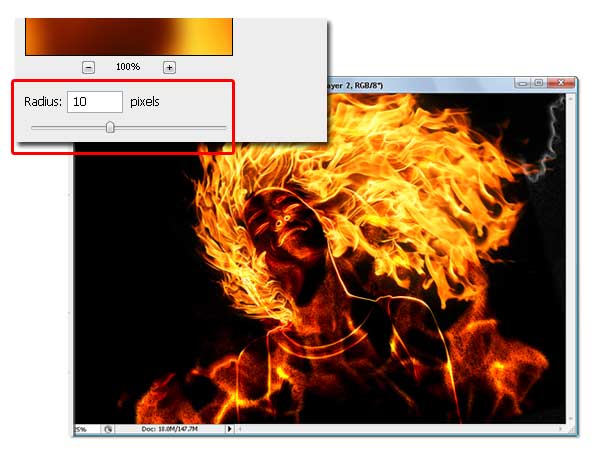
Step 18
Now add a layer mask to "Layer 2." Then use a soft round Brush tool with Opacity at 100%. Set the brush size according to your need, then just mask until the fire outside becoming hidden. See the process below.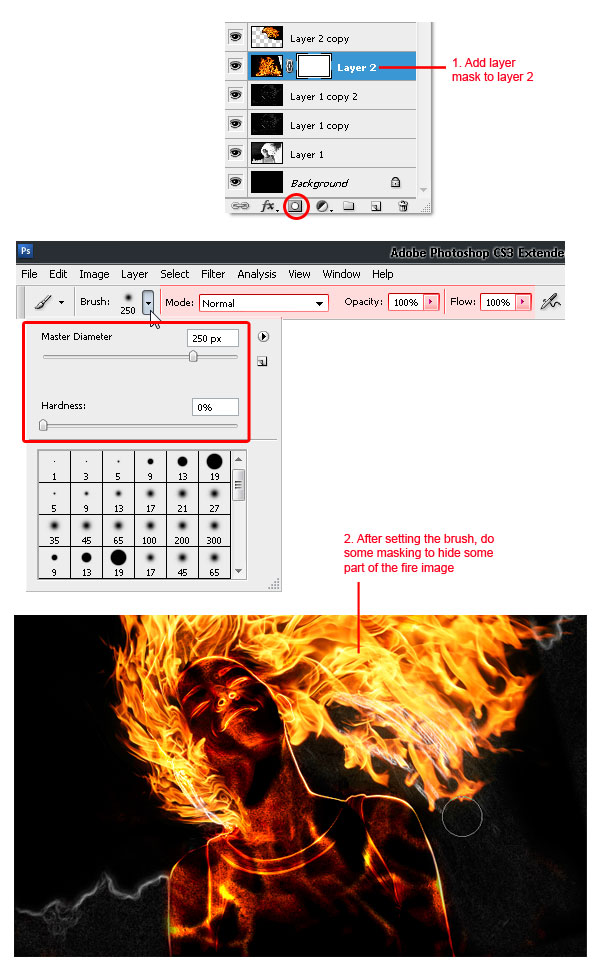
Step 19
Sure we will remove the white line shown in the image (marked in red rectangle below). First, add a new blank layer below "Layer 2." Then simply paint it with black using the soft round brush tool.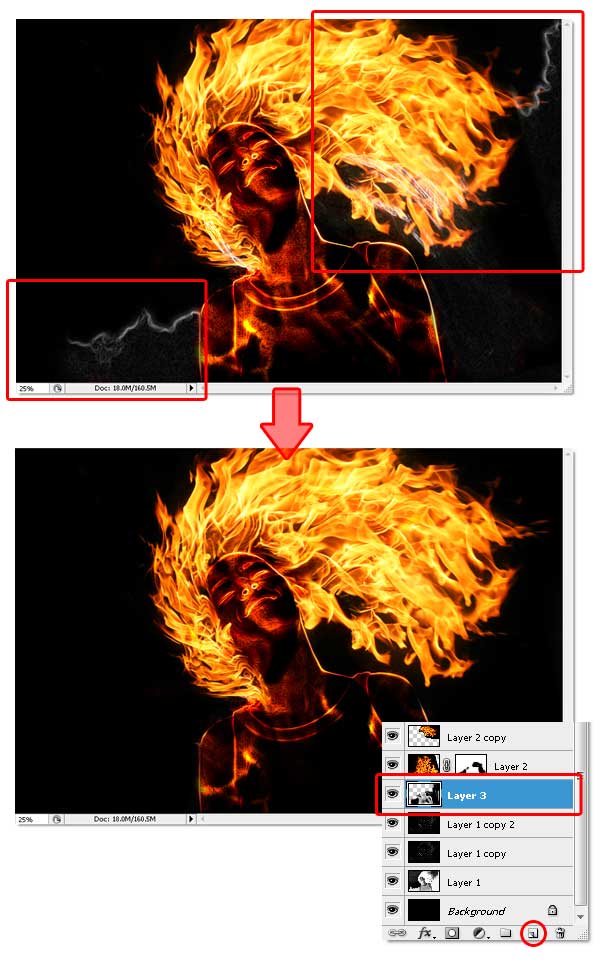
Step 20
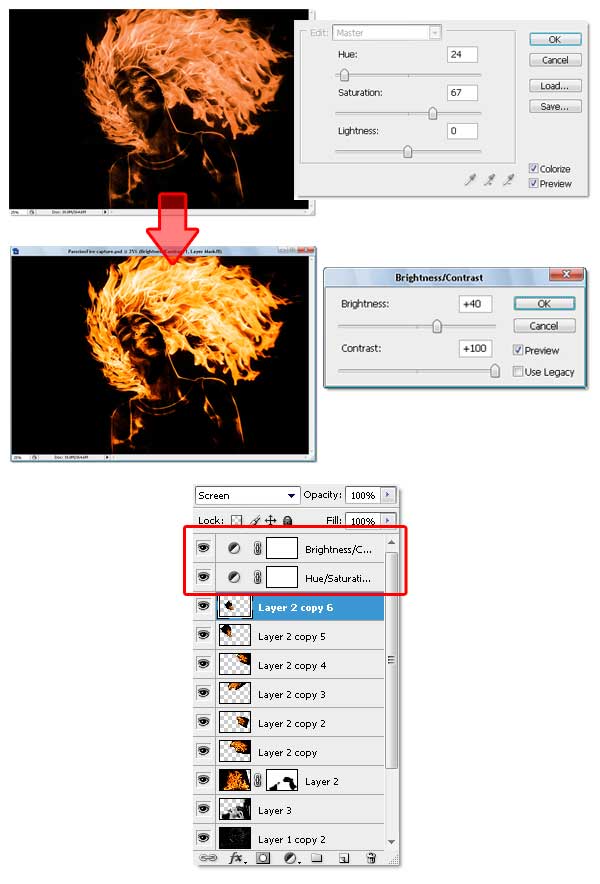
Now go to the top most layer (mine is: "Layer 2 copy 6"), add two adjustment layers which is Hue/Saturation and Brightness/Contrast. Careful not to change the layer adjustment order, or the color effect will be wrong. Below you can see the setting I used to complete this step, also pay attention to the adjustment layer order.By adding a Hue/Saturation adjustment layer, we unify all colors. The Brightness/Contrast adjustment layer brings more color contrast and makes sure the image color’s looks like real fire.
Step 21
I’m sure you notice the fire sparks effect. I create it using the Brush tool with this simple setting. No special brush needed, but if you have one that will be useful then feel free to use it. Below you can see all the settings I used within the Brush palette, of course you can change the setting as you like. Just make sure the brush spatter enough and vary the size.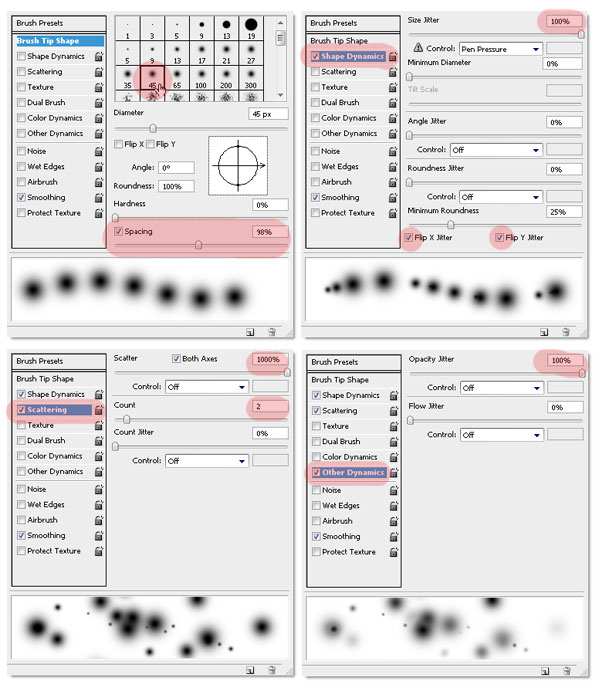
Step 22
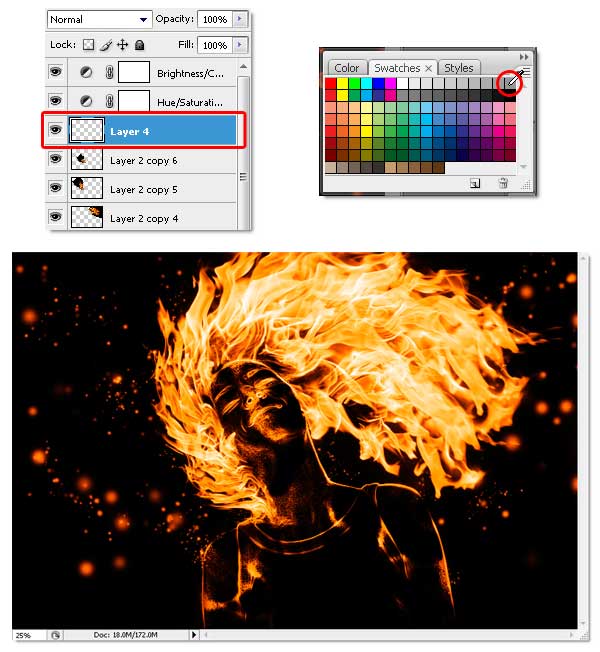
Now to use the modified brush, create a new blank layer below the adjustment layers ( mine is named "Layer 4"). Choose 50% gray from the swatches palette, then you can start creating the fire sparks. Remember not to be monotone, resize the brush size if needed. I start using a big sized brush, then reduce it to smaller size (you can change brush size faster by pressing the bracket keys on the keyboard ).If you’re not sure how to do this steps, just imagine where and how the fire sparks will flow if it was real fire. For me, imagining stuff is very helpful.
Step 23
To make it more interesting, create a new layer and change the Blending Mode to Screen. Then use a normal soft round brush (not the one we modified earlier), with an Opacity of 50%. Just click in the part of body, neck, and hair. I’m not sure how to explain this, but you can see the difference between the above and below images.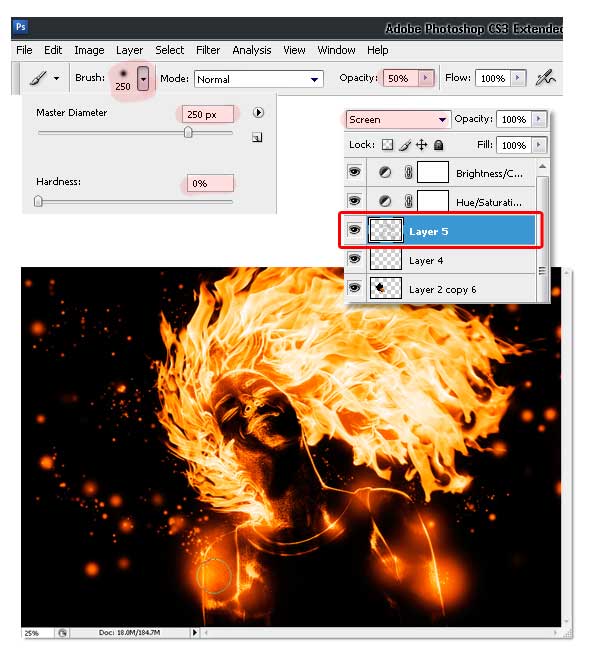
Conclusion
And that’s all of it! Hope you learned something new and had fun. You can view the final image below or view a larger version here.Subscribe to the Psdtuts+ RSS Feed for the best Photoshop tuts and articles on the web.


0 komentar:
Posting Komentar